Showing posts with label Dyestuff: Onion skins. Show all posts

Sunday, January 10, 2016

- True (indigo) blue ... at last

I've thought about doing some indigo dyeing for a while now. Not for the first time, as I participated in eighteenth-century colonial-style indigo dyeing with Kathy Smith back in the 1980s. A true purist, Kathy conjured a vat with stale urine. I wasn't so brave.

More recently, I tried my hand at Maura Ambrose's indigo vats (one chemical, one organic), dipping pieces of vintage linen tablecloth in and coming out with this for one ...

Patch #10

I left the hemstitched edge intact, liking the look of it, wondering how it might play out. And I may add some stitch later ... well, now actually ...

Snow falling in East Hampton, New Year's Day 1978


The b-side maybe even more realistic than the front

So, having mentioned the dyeing workshop, here at last are my photographic impressions of it (Maura's artistry shown with her permission) ...

Coming into Maura's home for the first time,
this was what hit me


Followed by this wonderful display of potential


and instruction

Works in progress abounded ...

and while most were machine-sewn, some were hand-stitched
and all had colors to dye for
Samplers of a sort hung on the walls,
some perhaps dating to Maura's days at SCAD

Bits of memory enshrined behind glass

Notebook pages that spoke for themselves ...

a full range of potential

carefully curated

artfully presented
Truly an inspiration ... to be continued

Friday, May 8, 2015

- Hoping it will all come out (okay) in the wash

After several days of hanging in gentle rain and persimmon-shaded sun, I brought in the newly dyed cloth.

Taking a idea from newfound KINDRED SPIRIT Deb Sposa at Artisun, I decided to iron half of each cloth on a high setting to see if the colors would set better with or without heat.

For sure the dyed images jumped out of the newly pressed cloth ...


But knowing that they might fade regardless of whether they were heat-set or not, I took some before shots to record what was ...

Red and yellow onion skins mordanted with
copper, alum and iron (from left to right)


Windfall lichen mordanted with
copper, alum and iron (from left to right)

Alum mordanted red cabbage, salvias and rosemary (from left to right)

So, with once last look at my favorite alum-mordanted salvias ...


I dispatched them to the (hopefully) tender mercies of the washing machine.

Film at 11:00 (if not sooner).

Tuesday, May 5, 2015

- The passage of time

As James Taylor says, "the secret of life is enjoying the passage of time" ... whether it's flying by when spending it with loved ones or dragging by when you're waiting for news or a special day.

So my solution to waiting for the latest dye trial results was to go out of town. It was worth it in every way imaginable ...


Of course, the best part of waiting was visiting the grands in Missouri ...


Followed by coming back to our Texas grandson ...


But getting to the dye results was definitely a little less sweet. I hadn't capped the jars tightly enough, so leakage and mold happened over the course of ten days ...


Rinsing off the decomposed plant matter was akin to what I imagine a dental hygienist experiences on a really bad day. Definitely not for the weak of stomach! But the results were pretty cool, some more so than others of course (this photo was taken following a preliminary rinse in warm tap water) ...


Mordants from left to right (note: all the cloth was pre-mordanted in soy milk, kept overnight in the fridge then rinsed):
  • Copper
  • Alum
  • Iron
Dyestuffs from top to bottom:
  • Lichen (windfall Parmotrema austrosinense)
  • Mealy blue sage (wild Salvia farinacea)
  • Rosemary (Rosmarinus officinalis)
  • Salvia amistad and S. greggi
  • Red cabbage
  • Red and yellow onion skins
My favorite? The alum mordanted Salvia amistad ...


Oh, and I almost forgot! Here's the B-side of Triangulation, now fully reinforced and worth every extra stitch, although the front looks virtually the same as before (which is why I haven't shown the A-side here) ...


The final reveal will probably be in pillow form, but only time will tell.

Thursday, November 13, 2014

- Cutting to the chase: Progress on dyeing

I've been taking pictures as I go and realized today that I have a fair bit of catching up to do. So I'll cut to the chase ...

Rust, red onion, and windfall lichen on linen

The picture above shows samples my more successful dyeing attempts, including vinegar-induced rust on Don's grody road-find ...


Grody road-find to the left is 3" in diameter
Love Potion #9 alum and red onion "preserves" ...

I wanted to see if fresh cut onion works as well as onion skins.
Turns out it does as long as the onion is firmly in contact with the cloth

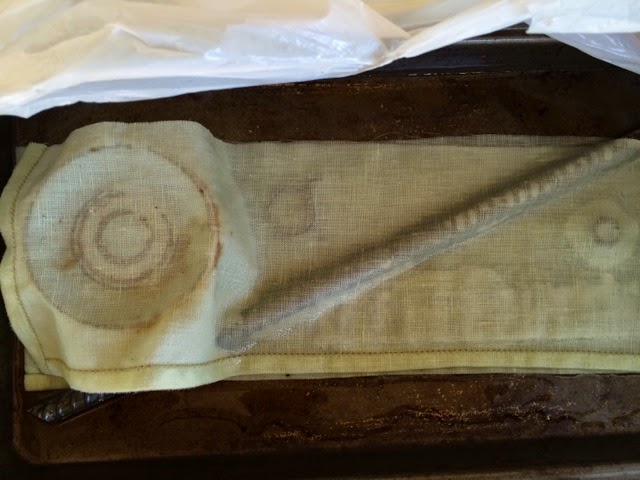
and India Flint inspired windfall lichen bundled in linen and poached for an hour in a hotpot full of tap water (after which it was left to cool overnight) ...

Note: I gathered well over two quarts of windfall lichen on our property in less than one hour
The canning jar to the left has water added to it, the one to the right has clear household ammonia

The acacia cassia pod dyeing was far less successful, as the three end products shown below were absolutely not worth the gag-inducing stench that accompanied opening up the canning jars ...

Original sheeting color (top)
Copper wire wrapped (1), Steel wire wrapped (2), and alum mordanted (3)

So, the grody thing has already been restaged with some indigo cotton and a rusty metal cap (found yesterday in the side yard, it nests into the grody thing like they were made for each other). Next time I won't get soooo excited about the results that I forget to put gloves on before picking up the cloth (my black-edged fingernails will be around to remind me for a while, I'm afraid).

I also went ahead and cut my 60-count linen weaving experiments off their shadowbox frame, since I now have a bead loom that is much easier to warp ...


and because one of the bits is needed for another dyeing project. More on that later ...

Tuesday, October 28, 2014

- Love potion #9: Red onion and alum

Note: that wonky bit of weaving is from Jude's Considering Weave workshop

I'm thinking if I document my dyeing trials online I'll be less apt to open the canning jars before their time. So for the record, here's what I put into canning jar #9:


  • 1 tsp. alum dissolved in hot tap water
  • 4 used tea bags in the bottom
  • 8 pieces of muddy dyed linen wrapped around slices of a tiny red onion
  • 1 piece of muddy dyed linen wrapped around dry red onion skins
  • 4 used tea bags in the top
  • Boiling tap water to fill
  • 1 limestone rock and 1 block of wood to compress
  • Cap loosely and put in the sun
I can't possibly wait two whole weeks, so I'm scheduling this one to be opened in ten twelve days on November 9th.

Addendum: And what if I added a limestone rock and a block of wood to compress the contents? What alchemical magic might ensue?

- On the learning curve: More lessons in dyeing

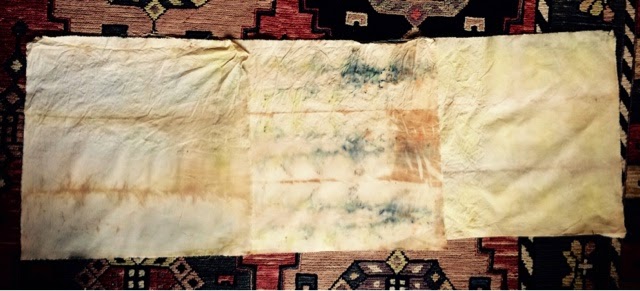
I'm calling this a good first pass at dyeing experimentation since there were a lot of lessons learned, chief among them: save a piece of the original cloth for comparison (or look back at this post to see what the tan sheeting looked like ... or look at number 9, which did a whole lot of not much).

Photo taken mid-morning under an overcast sky
Note: the colors in the photos are somewhat less intense than in "real life"


The four cloths in the top row were wrapped in copper wire. I particularly liked the avocado pits, which almost look like they discharged the tan, leaving a pale lavender/pink in its wake ...


The red onion also did well with the copper, leaving soft greens and peaches ...


The cloths in the middle row were wrapped in fine steel wire, which left its mark along with the avocado peels ...

Likewise, the iron in the steel brought out stronger colors from both the yellow onion skins ...


and the red onion skins ...


The cloths in the bottom row were treated to a dose of grocery store alum, which did virtually nothing with the avocado pits and peels, but provided the most dramatic yellow onion skin results ...


and red onion skins results ...


I was less successful with my last minute stew of acorns, windfall lichens, tea bags, onion and avocado skins in a copper pot with a selection of vintage white cottons and linens ...


To my eye, they are a pretty unappealing lot, with the exception of a tiny patch of lichen orange ...


So it's back to the drawing board ...

Monday, October 27, 2014

- Dyeing to get home

As you may recall, I left 12 canning jars and a copper pot full of dyestuff before hitting the road two weeks ago.

2500 miles later (San Marcos to Lubbock to Santa Fe to Oklahoma City to St. Louis to Tulsa to Fort Worth and finally back to San Marcos), this is what was waiting for me ...


I learned a thing or two as I opened the jars: 
  • rot happens (so point the jar away from you as you open it)
  • stuff swells (so don't pack the jar too tight, especially if it has a narrow neck)
  • numbering is helpful (so write numbers in permanent ink on cloth before dyeing)
As a reminder, here's what I put in each jar:
  1. Dried avocado pits (unbroken) wrapped in copper wire
  2. Broken avocado pits wrapped in steel wire
  3. Dried avocado skins wrapped in copper wire
  4. Dried avocado skins wrapped in steel wire
  5. Yellow onion skins wrapped in copper wire
  6. Yellow onion skins wrapped in steel wire
  7. Red onion skins wrapped in copper wire
  8. Red onion skins wrapped in steel wire
  9. Dried avocado pits wrapped in twine, with 1 tsp grocery alum 
  10. Dried avocado skins wrapped in twine, with 1 tsp grocery alum  
  11. Yellow onion skins wrapped in twine, with 1 tsp grocery alum  
  12. Red onion skins wrapped in twine, with 1 tsp grocery alum 
Too impatient to wait until they were fully washed and dried, I did take preliminary pictures of the cloth in jars 1-7 ... 


and 8-12 ...


They are now in the washer, so a fuller accounting will be made when they are a bit more presentable and the lighting a bit more consistent.

To be continued ...