Tuesday, October 5, 2010

- And so we begin again: Home on the Homestead

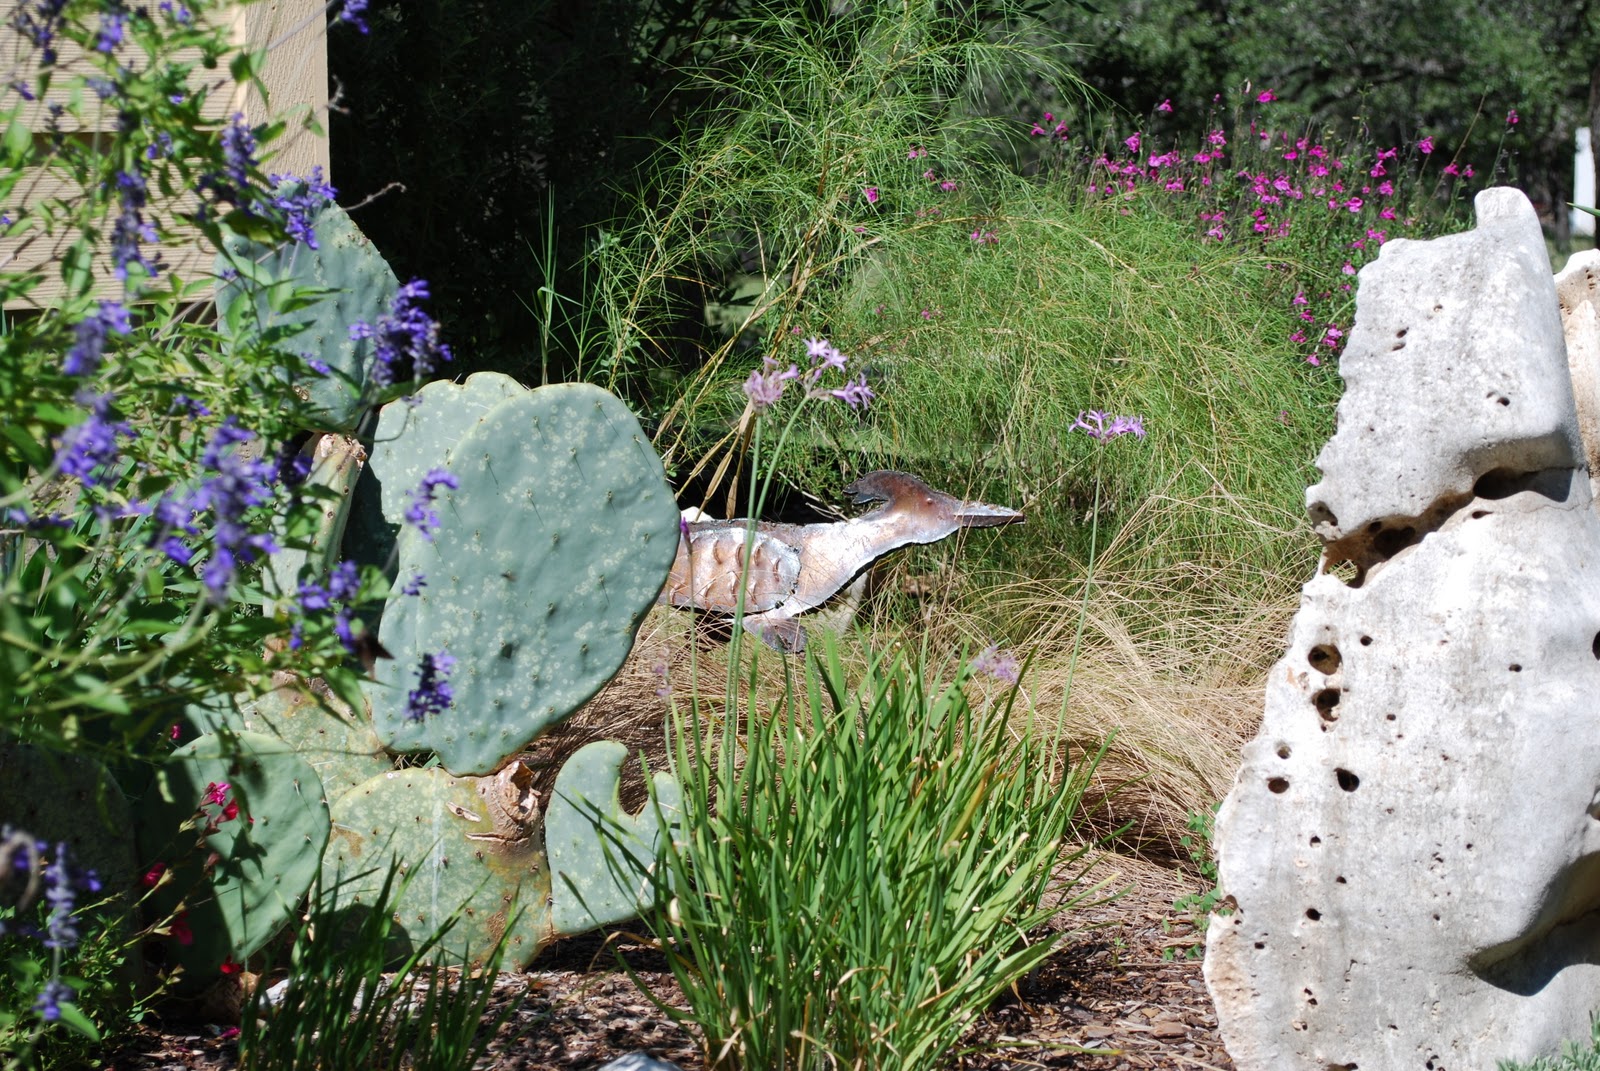
"I'm Going to Texas" began a little over a year ago with a posting about a roadrunner photographed a few miles from our new home in Wimberley. A lot has happened since then, not the least of which is our recent relocation to a five-acre homestead in San Marcos ... which explains both the roadrunner in our new garden to the right and the extended blog subtitle above.  Moving twice in a 14 months has been a challenge, but we're finally settling in and looking forward to being at 700 Cascade Trail for the long haul.

The house is wonderfully eccentric, and I'm waiting for Don to take some pictures that show it to full advantage. For now, suffice it to say that I'm like a kid at Christmas with a kitchen that has both a gas cooktop and an electric convection oven, which vie for favorite toy status with the granite sink we splurged on after moving in. You'll notice there are two faucets, one of which delivers filtered water for drinking. Our first few days at Cascade Trail were marked by some dismay as we discovered how hard water can be when it travels through 900' of limestone before reaching the surface. We ended up needing both a new water softener at the well head and a new dishwasher as a result ... but the up-side is we no longer have glasses coated in milky white calcium.

Of course, as we unpacked the boxes that were hidden away in the closets at Garrison Trail, we unleashed a flood of memories from Shelter Island, Williamsburg, and Avon ... and couldn't help but think of those we miss back east. Still, this is home now. We can only hope the bits and pieces of stuff that we've accumulated over the years will serve as talismans for the future.

So too does food serve as a reminder of good times past, with always the promise of the next memorable recipe ... like the buttery cookies we discovered at Austin's Central Market.

Alfajores

1/2 cup butter
2/3 cup sugar
1 egg and 2 yolks
1 tsp. vanilla
2/3 cup flour
1 1/2 cups corn starch
1/4 tsp baking powder
a pinch of salt
Canned dulce de leche (if you can find it)


  • Cream butter and sugar. Beat in eggs and vanilla. Carefully mix in flour, corn starch, baking powder and salt.
  • Roll 1/8" thick, cut into 1 1/2" rounds. Bake on parchment paper in a 325 degree oven for 9-10 minutes (you don't want to brown them, so I don't use the convection oven for this recipe).
  • Cool and fill with dulce de leche (to be authentic), or jam, or lemon curd, or ganache ... the list is endless. Sprinkle with powdered sugar and try not to inhale.

Saturday, August 28, 2010

- Corn on the 4th of July: Melting pot hot dogs

We've been enjoying a rolling feast of corn this year.  The first batch arrived fresh from Mexico in May, followed by east coast corn on the Outer Banks in June, Texas corn from Fredricksburg in July, and Briermere corn on Shelter Island in August. Me a locavore? Not when it comes to corn ... I'm forever in search of the tiniest, sweetest kernels that come with the season's first ears, wherever they may be. 

Fresh corn on the cob is best savored by boiling it for a few minutes, slathering on butter and then adding a  sprinkling of salt. But when it's more than a day old, corn just isn't the same. So to help out store-bought ears, I've become a fan of Mexican-style grilled corn which is coated with a thin sheen of chili-spiced mayo, a sprinkling of grated Cotija cheese and a squeeze of fresh lime juice. 

Which brings me to the past 4th of July. Now the 4th is one of three All-American holidays calling for burgers and hot dogs on the grill, the other two being the summer bookends: Memorial Day and Labor Day.  Of course, a proper cookout must have the full cast of supporting sides: deviled eggs, cole slaw, sweet pickles, and potato salad. Which is to say, lots of time in the kitchen. But with only two of us in the house, I couldn't muster the requisite energy for preparing a full cookout spread.  Thus was born the Mexican Corn Dog: a kosher hot dog topped with savory corn-off-the-cob and wrapped in a flour tortilla. Now if that's not melting pot Americana, I don't know what is.

Last I checked, there was fresh sweet corn from Colorado at Brookshire Brothers and Labor Day approaches. Let the feasting begin ...

Mexican Corn Dogs

Grill or boil some corn.  Cool, then cut the kernels off the cob.  Depending on how much you have, spoon in a little mayo (I use Hellman's), squeeze in some fresh lime juice, then sprinkle on grated Cotija cheese and a dash of chipotle chile powder (optional, but it adds a wonderful smoky heat). Taste and adjust seasonings to suit.

Grill kosher hot dogs (Nathan's if you can find them, or Hebrew National) until gently charred.

Nuke a stack of flour tortillas in the microwave (freshly made if you can find them, or even make your own).

Assemble hot dogs, Mexican corn-off-the-cob and shredded jack cheese on warm tortillas. Best served with Fat Tire or Skinny Dip (but you'll have to go to the Outer Banks or come out to Texas to find those).

Sunday, May 30, 2010

- A little bit of smoke: Learning to love the heat

It's really great when your kids grow up ... especially when they get you cool toys for Christmas. We've been having fun playing with two in particular: the web cam that Meg and Paul gave us, which lets us watch Max the Weimeraner puppy grow before our eyes even though he's hundreds of miles away in St. Louis. And then there's the mini-panini press that Meliss and Jake gave us, with griddles that can be popped in the dishwasher and a surface area that's just right for two.

I must admit we did have some struggles at first. Piling too many ingredients onto bread sliced a shade too thick resulted in no little consternation as our creations ended up slip sliding away when we tried to close the press. But necessity is the mother of invention, so invent we did. Today's lunch was the logical culmination of a series of experiments. It's time to share.

First, you must find wonderful bread. We're fortunate to have found a bakery called Phoenix Rising, where they bake organic breads in a wood-fired brick oven. And there was some leftover rotisserie chicken in the fridge that, along with red pepper, bi-colored squash, avocado, red onion, and fresh mozzarella, seemed just the thing for lunch. Now you can see the problem already ... how to balance all this stuff onto a slice of bread?

Easy. Mush it all together. First grate the veggies, then the cheese. Chunk up some chicken and avocado. Peek out in the garden to see what the deer have left. Rosemary today, other days cilantro, basil or chives. Throw in some toasted pine nuts, salt, and pepper. Then wonder ... what else?

Thin slices of bread, brushed with olive oil and heaped with the filling go onto a hot press, which doesn't get pressed at all, but gently tucked on top of the sandwiches. Then we wait and Don is tasting the leftover filling, saying, "What's in here?" And I smile, because there's something new ... just a little bit of smoke, and a little bit of heat.

The sandwiches come off the press and they taste just right, though odds are we won't have exactly this mixture again. Next time there will be different veggies in the fridge, some other leftover meat to use up. But the smoke ... I won't leave out the smoke: finely diced heat from the tail end of a chipotle, it's better than bacon.

Gotta love Texas.

Friday, May 28, 2010

- Whisking away in Margaritaville: The best salad dressing ever

One of my co-workers left her salad dressing at home the other day, so I shared some vinaigrette that I had stashed in the fridge at work. When she said she'd like the recipe I was shocked (shocked!) to find that I didn't have it posted on the blog. Known in our house as Trellis Vinaigrette, it's loosely based on a recipe from the Trellis in Williamsburg, but it's been ages since I looked at the recipe; I know it by heart.

The all-time Ackert family favorite application for Trellis Vinaigrette is Grilled Chicken Salad ... a bed of leaf lettuce greens topped with bite-sized pieces of grilled chicken (fingers of boneless, skinless chicken breast marinated in white wine and lemon juice for 15 minutes before grilling over a hot charcoal fire), toasted pecans, sliced scallions, boiled (or nuked) red bliss potatoes, and crumbled bacon (a dry cure is best). Some sliced strawberries on top and a generous dose of vinaigrette will do you.

Trellis Vinaigrette also adds great tang and ably moistens deviled egg filling, cole slaw, and potato salad , all of which will no doubt make an appearance on our Memorial Day dinner table, along with burgers and Nathan's hot dogs.

Trellis Vinaigrette 

Juice of 1 or 2 lemons
An equal quantity of apple cider vinegar
Safflower oil, one and a half times the lemon/vinegar quantity
1 heaping teaspoon of Dijon mustard for each lemon
Kosher salt

This recipe is all about proportions.  Since you can't control how much juice is in a lemon, that quantity becomes the basis for the rest of the recipe. So juice the lemon(s) and put the juice in a measuring cup.  Eyeball an equal quantity of apple cider vinegar then make note of the combined quantity. For example, if I squeeze 2 lemons, it usually yields about 1/3 cup of juice, to which I add 1/3 cup of vinegar. Place in a steep sided bowl or a lidded glass jar and add 1/4 tsp salt (you can add more later depending on your taste) and one heaping teaspoon of Grey Poupon Dijon mustard for each lemon ... two in the example we're working on here.

Now measure 1 1/2 times that quantity in safflower oil (which is light, wonderful, and hard to find) ... so, 2/3 cup of lemon and vinegar requires 1 cup oil.

Here's where I part ways with cookbook orthodoxy: I do not slowly drizzle the oil into the lemon and vinegar while whisking away (gasp). Instead, I either shake everything together in a lidded glass jar or I put the whipped cream whisk attachment on my hand mixer and beat until the vinaigrette turns thick and creamy.

If it seems watery, I plunk in a little more mustard and/or oil. If it's bland, I throw in a little more salt, maybe even some pepper.

All of this is greatly facilitated if I have a Margarita in hand as I make the vinaigrette. Fresh lime juice, agave nectar, and a good tequila, shaken in crushed ice. Yum ... think I'll go whisk some up right now.

Friday, May 7, 2010

- Do it yourself Potstickers

I well remember the first time I had potstickers at a Munson family wedding in northern Virginia.  They were a revelation: soft dumplings caramelized on the bottom and filled with savory pork. But they were impossible to find in 1990s Williamsburg, so I was overjoyed to see them on a TGIF menu in Orlando, Florida when we took a family trip to Disney World. As I recall, the company of our hosts, Cathy and her son Alex, was the highlight of that particular meal, the potstickers turning out to be deep-fried and less-than-revelatory.


Continuing to seek out potstickers over the years yielded a string of less-than-memorable dining experiences, with the end result that I finally decided to try making my own. The Food Network recipe I printed out over the Christmas 2004 holidays and served to the girls and my folks is riddled with strikeouts and the ever-present beverage recommendation "good with beer." They were a lot of work and the end result never quite reached the level of that first magical taste so many years before. The packaged wonton wrappers that I used were too thick and doughy, often cracking and always overpowering the filling. After a couple of tries, I gave up on the recipe.

So potstickers were the last thing on my mind this past weekend when we were flying back to Austin after attending the funeral for Don's mother, Betty. Having exhausted my reading material (Eat, Pray, Love and Ruth Reichl's For You Mom, Finally), Meg filled the breach with the May issue of Food & Wine magazine. In addition to some intriguing recipes for oatmeal pine nut bars, semolina pancakes, pork and pineapple tacos, and hummus, there was a recipe for do-it-yourself dumplings.

Stopping to pick up some groceries as we drove out of Austin, I was primed to look for potsticker ingredients. Central Market did not disappoint. Fresh ginger, garlic, scallions, cabbage, and shitake mushrooms, along with freshly ground pork, made their way into the basket. Too travel weary to tackle making the "easy five minute dough" promised by Food & Wine, I cooked up an improvised pork filling and stuck it in the fridge, where it languished for a couple of days.

When I did get around to making the potstickers two nights later, we had eaten our way through three quarters of them before I realized they were worth a picture ... and a recipe.

Potstickers (serves two)

Filling 
2 Tbs safflower or peanut oil
3/4 pound ground pork
1/2 cup rough chopped shitake mushroom tops
1 garlic clove
1 inch peeled fresh ginger
1/4 cup thin sliced scallions
1/2 cup finely shredded cabbage
Sesame oil
Soy sauce
Microplane box grater (this thing scared the heck out of me when I first got it, but now I use it all the time)

Slice green scallions into thin rounds.  Finely shred the cabbage using a medium-sized microplane blade.

Heat the oil in a saute pan, throwing in the pork and shitakes first.  As the pork begins to cook, gently break it up with a wooden spoon (I used an old bamboo paddle that came with a wok that has long since departed ... it's one of my favorite cooking tools).

Grate the garlic and ginger on the finest microplane blade and toss them into the pan, turning the heat down to medium high if things look like they're moving too fast.

Taking care not to overcook the pork (which will get more cooking time in the dumplings), add the sliced scallions and grated cabbage, then cook for another half minute or so. Season with sesame oil and soy sauce to taste. Remove from heat and let cool while you make the dumplings or refrigerate the filling for another day.

BTW, this is more filling than you need to fill 16 dumplings, but the leftovers are a great way to pass the time while the potstickers are cooking.

Dumplings
2/3 cup bread flour (the better to develop gluten)
1/3 cup water
1/4 tsp safflower oil floated on the water
Pinch of salt
1 cup chicken broth (homemade, of course)
2-3 Tbs. safflower or peanut oil for frying

Put the flour in a food processor with 1/4 cup of the oil/water mixture and a pinch of salt. The goal is to make a "raggy dough" according to Food & Wine magazine. As the food processor whirls, add water until the dough masses into a ball. Stop and feel the dough. If it feels dry, restart the food processor and drizzle in more water. If the dough sticks to your finger when you poke it, give it another whirl and sprinkle in a bit more flour until it is just past sticky. 

Don't worry about over-processing ... by forming gluten, you end up with a stretchy dough that handles beautifully. However, you will need to give the dough a rest so that it doesn't act like a rubber band when you try to roll it out. Remove the dough ball from the food processor, gently form it into a disk shape, adding just enough flour to keep it from sticking to your hands, and leave it in a small bowl for 15-30 minutes.

Divide the dough in half, divide the halves into quarters, the quarters into eighths, and stop dividing when you end up with 16 little nuggets of dough. Lightly flour a pastry cloth and rolling pin, then coax the little balls into 3-4" rounds. You'll be amazed how thin you can make them by stretching the dough rounds after rolling them out.

If you made the filling in advance, this would be the time to gently warm it in the microwave (please don't use a high setting ... 40-50% power is much better).  If it seems dry, a splash of chicken broth will help it along.

Put out a sheet of waxed or parchment paper. Dip your finger in water and run it around the edge of a dough round, place a tablespoon of filling in the middle, pinch the dough closed and put the dumpling on the waxed or parchment paper. When you get halfway through filling the dumplings, which look like fat little purses, check the first few and turn them over if they are starting to stick to the paper. If any holes open up, gently pinch them closed.

When the dumplings are filled, heat a few tablespoons of safflower or peanut oil in a skillet large enough to fit all sixteen. Fry the dumplings on high for a minute or two, then add 1/2 cup chicken stock and put a lid on the pan.  Cook another minute or so, then take the lid off and let the stock boil away, gently coaxing the potstickers to keep them from sticking too firmly.  Peeking to see if the dumplings have caramelized on the bottom is allowed. BTW, when Don asked why the potstickers weren't cooked on top, I defied orthodoxy by flipping the dumplings at the last minute to caramelize them on both sides.

Serve immediately, dipping the potstickers in soy sauce to taste ... you can even make a wonton soup of sorts by plunking them in hot chicken broth if you're so inclined. I think we drank a light pinot noir the other night, but an unfiltered sake would be even better (although nigori can be hard to find). Side dishes of rice and/or slaw with an oriental dressing are logical accompaniments if you're really hungry, but as a light supper, potstickers can stand alone.
Wednesday, April 28, 2010

- Idyll: Pedernales Falls

We headed out to Pedernales Falls last Sunday ...  which is pronounced per-duh-nal-ess for some reason. Not having much experience with rivers and falls, I guess I expected sort of a miniature Yosemite ... all verticality and plumes of mist. But that wasn't what we found. The falls were flatter and wider than I expected. And when I closed my eyes, I could hear the echo of breakers from the Outer Banks, though there was no gull-cry or salty tang in the air.

Coming to the bottom of the rocky slope, we stepped out onto a dusty sandy ... beach?  Well, not exactly. Still, I couldn't help but think of Ram Island as I found my way to the edge of crystal clear water lapping over rounded river rocks that looked ever so much like cobbles deposited by a long-ago glacier. There was even a tiny Hay Beach tower that begged to be imitated. So while Don clambered over boulders taking pictures of lizards and exotic plants (you'll have to visit his blog to see those), I played at making rock castles and had my day in the sun.

Sunday, April 25, 2010

- Waffles Four Ways

I just spent the past four days with four guys in the house ... three of them imports from Stonehouse Elementary School in Williamsburg, come to check out the Texas Hill Country. Don took Mark, Scott, and Jeff to Austin and beyond, averaging two bands a night while they liberally sampled the local beverages, braved the heat of various chili peppers, ate all the barbecue a body could hold at the Salt Lick, watched the bats fly out from under the Congress Street Bridge, climbed Mount Bonnell, and ... well, you get the idea.

Austin trailer-made breakfast tacos and migas made a particularly big impression, so I was under heavy pressure to come up with an impressive final meal this morning. Fortunately, I went to Brookshire Brothers last night with a notion to get some fried chicken to go with waffles. Better than chicken, I found poblano sausage made on-site by Norman, who is our local butcher par excellence. Don fired up the grill in order to bring out the best in the beef, pork, and cumin-laced links. Meanwhile, I prepped a couple of quarts of strawberries, nuked some hot fudge sauce, and whisked up some waffles.

Waffles used to be a regular weekend offering in the Ackert household. Made with a quarter pound of butter per batch and tricked out in Haagen Dasz vanilla ice cream and hot fudge, they were pretty popular ... until we found out that Don's cholesterol level had climbed into the upper stratosphere. So it was nice to have an excuse to put them back on the table.  Besides, there are no calories in Texas, at least not when you're on vacation.

In the end, I gave the guys a choice of waffles four ways: with fried chicken and maple syrup, poblano sausage and agave nectar (with thanks to Meliss for introducing us to its subtle sweetness), ice cream and strawberries, or ice cream and hot fudge sauce. When I asked them what they wanted, the answer was, "Yes."

Wimberley Waffles

1/4 pound melted butter 
2 eggs
2 cups milk (whole milk, preferably)
Bisquick

Melt the butter by nuking it for a minute.  Whisk the eggs and milk together.  Then whisk in the butter and just enough Bisquick to make a thin batter.

My waffle iron takes exactly 2 minutes and 40 seconds to make the perfect waffle ... but you'll need to experiment with batter and times until you hit what works best for you.  This recipe yields a light, crisp waffle that is best eaten hot off the iron.  Just keep 'em comin' and don't be worrying about leftovers.

Sunday, March 21, 2010

- Don't take a picture ... remember this in your heart

Once upon a time there was a little church …

 
As with most little churches, it was rather humble and not very well to do. But it was led by a gentle man named Father Jim+ who reassured my long-ago-young-mother self that offerings of time and talent would be valued as highly as monetary treasure. So it was that I offered my time to the cause of baking Simnel (var. Simnal) Cake.

Jim supplied both the recipe and the following explanation to the bakers who were charged with feeding the hundred or so souls who were expected to attend church the following Sunday:
Simnel Cakes are traditionally prepared on the fourth Sunday in Lent, called Mid-Lent or Mothering Sunday. The name Mothering Sunday originated from the medieval custom of visiting the Mother Church, or cathedral, on this Sunday. In parts of England, it was also the tradition of servants and apprentices to make a special visit to their parents on this day. Whatever the occasion, especially popular was the gift of Simnel Cake. It is a very rich cake shared during a brief break from the Lenten fast. Simnel Cake can be given as a gift: cut into small pieces, wrapped in shiny foil, and tied with a bit of colorful ribbon or string.
Merriam-Webster's (at m-w.com, my favorite online dictionary) defines simnel as "a rich fruitcake sometimes coated with almond paste and baked for Mid-Lent." As with most Simnel Cake recipes, Jim’s called for currants and citron. And indeed it made sense that any mid-winter confection made centuries ago would have dried fruit in it. Unfortunately, a fruitcake is a fruitcake. And though I followed Jim’s recipe to the letter, I watched as most of the gifts were unwrapped and then surreptitiously trashed after a single bite.

Not being a great fan of dried fruit myself, I reasoned that my medieval predecessors would certainly have used fresh fruit had it been available. It didn’t take much of a mental leap to conclude that the candied lemon and orange peel in the recipe could be replaced with freshly grated citrus rind. I self-servingly passed over the issue of dried currants and reworked the recipe to my liking. The resulting new-style Simnel Cakes were offered at the little church for many years, with more than one parishioner requesting an “extra to take home.” If any ended up in the trash, they were few and far between … victims, no doubt, of stalwart fruitcake aficianados.

Fast forward twenty years. My younger daughter, now twenty-four, dropped in from St. Louis last weekend. Since eating well is de rigueur at any Ackert family reunion, I had stocked up, adding almond paste and fresh fruit to a shopping list heavy on tortillas, avocadoes and chipotles. Though I didn’t wrap them in foil, the Simnel Cakes made for a proper Mid-Lent celebration … a welcome break from the fast of missing Meliss.

Simnel Cake

3/4 cup butter
2 cups sugar
3 large eggs 
1/4 tsp. almond extract (optional)
1 Tbs. grated lemon peel (one lemon)
1 Tbs. grated orange peel (one small orange)
1 ½ cups flour
7 ounces almond paste (I use Odense)

Use a 13" x 9" baking pan with sides. Spray the pan with Baker's Joy or Pam cooking spray. Line it with parchment paper. Spray the paper with more cooking spray.

Grate the orange and lemon peel, with a microplane if possible. Cream butter and sugar. Beat in eggs and grated peel. Stir in the flour. The dough will be like a very thick cake batter.

Warm the almond paste in the microwave at 20-30% power (warm) for 30-60 seconds, until soft and pliable. Roll out the almond paste between two pieces of parchment paper. The idea is to roll the paste thin enough to cover 13" x 9", but since it won't show, it doesn't have to be perfect. It can even be in pieces, which is actually easier.

Spread half the dough in the pan (the trickiest part … using a metal spreader works best). Lay almond paste on top of the dough (in pieces is fine). Spread the remaining dough on top of that. Don't fuss with it too much ... it will spread out as it cooks.

Bake at 300 degrees for 50-55 minutes, until golden. Cool slightly before inverting onto a cutting board. Peel off the parchment and trim the edges (great for nibbling!)

Ice with 1 to 2 cups of confectioner's sugar, 1 Tbs. melted butter, and enough lemon and orange juice to make a thin glaze.

Cut into bars. Wrap in foil and colored ribbon to make a proper gift.

Sunday, March 7, 2010

- Oh fudge!

I am absolutely, undeniably, no-doubt-about-it addicted to chocolate. Gotta have it … every day … just a little bit. Okay, sometimes more than a little bit. Hey, I’ve heard chocolate is actually good for you and until it’s proven otherwise, I’m inclined to believe it.

And so, in a conversation over dinner at the Cool Mint Café last night (a wonderfully spontaneous trek to San Marcos with our Garrison Trail neighbors), I mentioned my Mom’s hot fudge sauce with a fair degree of enthusiasm. Incredibly easy to make, it was the topping of choice on Hildebrandt’s hand-dipped vanilla ice cream when I was growing up. These days, I must confess that I sometimes make microwave ganache as an even quicker route to chocolate bliss when the vanilla Häagen-Dazs is looking lonely.

Then there’s the fudge I made for the first time this week. Inspired by a New York Times Dining section recipe, which I changed of course, it received rave reviews when passed around to my colleagues at the Alkek Library. So, without further ado, I present chocolate three ways: sauce, ganache, and fudge. May you eat them all in good health.

Mom’s Hot Fudge Sauce

2 ounces unsweetened (baking) chocolate
¼ cup sugar
1/3 cup water

The original recipe calls for cooking the sauce slowly over medium heat until satiny smooth (5-10 minutes of constant stirring). It can also be made in the microwave by alternately nuking it on high for one minute, then stirring, nuking for another minute, stirring, and finishing with another 30 seconds if needed before stirring it to its final satin glory.

Lazy Ganache Sauce

2 Tbs. heavy cream
1/3 cup Ghirardelli 60% Cacao bittersweet chocolate chips

Nuke the cream for 30 seconds. Stir in the chips until melted. Done.

I-did-it-my-way Fudge

12 ounce bag of Ghirardelli 60% Cacao bittersweet chocolate chips
4 ounces unsweetened (baking) chocolate
4 Tbs. butter
14 ounce can of sweetened condensed milk
Generous ½ cup of walnut pieces

Line an 8x8 pan with waxed paper. Melt the first four ingredients over hot water in a double boiler (you must own one of these … they are indispensable … more recipes to follow). Stir constantly (having a phone conversation at the same time is not recommended).  Fold in walnuts, pour into 8x8 pan. Refrigerate until set. Take out of pan and peel off the waxed paper. Cut into ¾” squares (they’re too rich to be any bigger … besides, you can always eat two).

And though I haven’t tried it yet, I’m thinking that toasted hazelnuts could substitute for the walnuts. Another possible variation: a sprinkling of grey sea salt. Ah … life is good when you have something to look forward to.

Sunday, February 21, 2010

- Channeling Mom: The best oatmeal cookies ever

I was slowly sinking into the sofa, getting more horizontal and closer to sleep by the minute … a common enough occurrence after a long day of work and a good dinner.  But something kept tugging at the edges of my consciousness, much as I tried to ignore it.  It became an irresistible impulse, and I found myself heading into the kitchen to make cookies.

Although the truth is, cookie making has been something of a disappointment since we came out to Texas.  I miss my convection oven, and the chocolate chip cookies that were my pride and joy in Virginia just don’t come out the same since we moved.  Still, I love chocolate and what I craved was my Mom’s oatmeal cookies with chocolate chips.  Just one problem:  I have yet to succeed at making them.

Mom’s cookie recipe came from a 1959 cookbook created by the gentle women of the Shelter Island Presbyterian Church.  The brown-edged pages betray its age, and page 70 in particular is covered with spatters of butter, eggs, and vanilla from years gone by.  


The red penciled notes still visible in Aunt Libby’s recipe for Oatmeal Coconut Wafers leave one to wonder if Mom’s “excellent” refers to the original recipe or her variation on it.  She never went back to insert a note about adding chocolate chips, but one thing’s for sure: her substitution of wheat germ for coconut was inspired.  Mom’s oatmeal cookies were always lacy thin, with a crisp finish that eluded me every time I tried to duplicate them. 

“Just bang the pan halfway through baking them,” she would say when I called to bewail my latest failure.  And so I’d try again, slamming the pans against the oven door to no avail.

“Maybe it’s the weather,” she said on yet another attempt. “You really should only make them when the weather is dry and it’s awfully humid down your way.”

Well, with the recent Texas hydrology report of rainfall at 150-450% above normal, I figured I was doomed to failure yet again.  Flipping open the cookbook, I pondered how to adjust the recipe and tossed ingredients into the bowl.  Tasting the end result, I decided that it wouldn’t much matter if the cookies didn’t come out … the dough was delicious.  I wrote down the recipe, just in case it was worth keeping.

It was, and it is.

Garrison Trail Granola Cookies 
(makes 3 dozen)

1/3 cup Land O Lakes Spreadable Butter with Canola Oil
1/3 cup white sugar (scant)
1/3 cup brown sugar (generous)
½ tsp vanilla (more or less)
Revised 8/28: 1/6 cup beaten egg (half of a 1/3 cup measure)
1/3 cup flour
1/3 cup Kretschmer Original Toasted Wheat Germ
1/3 cup chopped Ghirardelli 60% Cacao Bittersweet Chocolate Chips
¼ tsp. baking soda
¼ tsp. baking powder
¼ tsp. salt
1 cup Garrison Trail Granola (see recipe index to the right)

Cream butter and sugars.  Beat in vanilla and egg.  Fold in dry ingredients.  Batter will be quite moist.  Scoop ½ tsp. portions onto parchment paper (trust me, you don’t want to bake these directly on the cookie sheet, no matter how well you butter it).


Bake 6 minutes at 350:
When cookies have puffed up, slam the pan on the oven door to flatten them:
Bake 2-3 minutes longer until dark golden brown:
Slide the cookies, parchment paper and all, onto a wire rack to cool.  BTW, these are insanely good broken up and sprinkled over Haagen Dazs vanilla ice cream.


Bigger Batch

1 cup Land O Lakes Spreadable Butter with Canola Oil
1 cup white sugar (scant)
1 cup brown sugar (generous)
1 tsp vanilla (more or less)
2 eggs
1 cup flour
1 cup Kretschmer Original Toasted Wheat Germ
1 cup chopped Ghirardelli 60% Cacao Bittersweet Chocolate Chips
3/4 tsp. baking soda
3/4 tsp. baking powder
3/4 tsp. salt
3 cups Garrison Trail Granola (see recipe index to the right)