Page 6 of Moon Myth ...
with some cloudy blue skies and pure white damask, both courtesy of Deb Lacativa who responded awesomely to my request for SunMoonStars cloth ...
and likewise Deb's "dirty threads" seen here encircling the reverse appliqué edge.
As we drove to Austin yesterday, I spotted the same kind of cloud edging that I was going for ...
albeit a bit more artfully done by Mother Nature.
Unfortunately, I'm less than thrilled with progress on Page 7 ...
So my solution is to cover it up with text rather than try to to rip it all out (and fortunately, I have more of Deb's beautiful dark blue cloth to work with) ...
Finally, I haven't forgotten Hazel's query about how I worked my crossed stitch edging a while back. So, for those who might be interested, here's a step by step.
After pre-cutting a white damask crescent and lining it up behind the cloudy blue cloth which had an erasable marker circle drawn on it, I invisibly basted both to the light blue cloth. Then I cut along the edge of the marked circle, creating a reverse appliqué ...
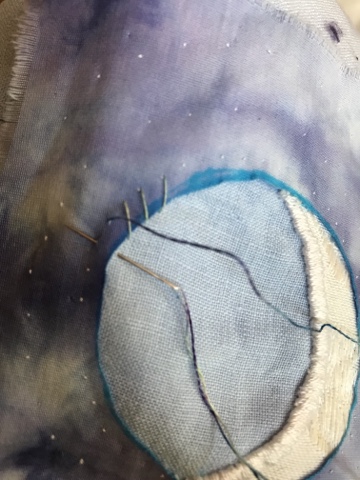
Of course, I forgot to take process shots of the first step, so what you see is the step where I am wrap stitching the edge of the crescent moon in leftover wedding handkerchief silk ...
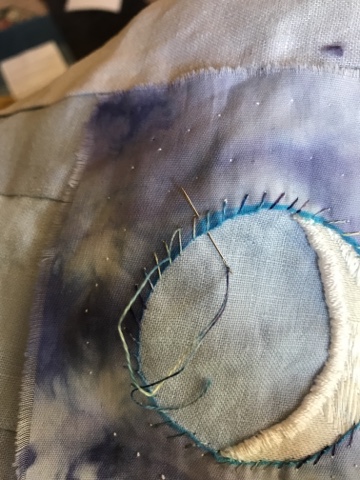
After securing the moon's edge, I took a single strand of Deb Lacativa floss and began to stitch counterclockwise around the edge of the cut circle, using the invisible baste stitches as a guide ...
Note: in the earlier version, the invisible baste stitches were larger detached back stitches, and I intentionally varied the distance of the stitches from the edge of the circle ...
After completing the first pass ...
After completing the first pass ...
I reversed direction ...
going clockwise ...
to complete the edge ...
As I commented to Hazel, I enjoyed this far more than blanket stitching, but for sure the raw edge will be far more prone to fray. That's okay by me for this application, but might not be appropriate for others. Certainly, a turned appliqué edge on the outer circle could precede the crossed stitch edge for more stability.


I love the moon you have covered up!
ReplyDeleteMo - I laughed ... perhaps I can cut it out and send it to you
ReplyDeleteSo beautiful, Liz. I love this moon beyond words.
ReplyDeleteThank you Peggy ... I love its gentle rock to one side, the lack of which decided me against the page 7 moon
ReplyDeleteAmazing process and Moon! This page reminded me of a time long ago when one of my work parents told me that the moon you see in the daytime is called "a children's moon". I had never heard of this and Googled it when I got home. Sure enough, Children's Moon...because the children are awake in the daytime and so can see it, while the moon in the dark night sky is seen when children are safely tucked in bed asleep! xo
ReplyDeleteNancy - I had never heard of this and love the idea. At one point I tried to insert my St Louis grandkids’ moon descriptions into the story, but it felt awkward. They call the phases banana moon, taco moon, and round moon.
ReplyDeleteLiz~ Ha! I love this!
ReplyDeleteGreat process photos, making sense of it all, thank you. I think you should make a second book of the moons your grandkids describe!
ReplyDeleteHazel - your comment got me thinking I could give them credit in an acknowledgements page ... or pages, as their are many who have inspired me (your stars are in my mind as I write this)
ReplyDelete