Saturday, October 4, 2014

- Compost (like Grace) Happens

It's amazing how my attitudes have changed over the past five years ... from "Five acres? No way!" to "Well okay, but I'm only going in the high grass when it's cold enough for the snakes to be hibernating" to cactus whacking all summer long (albeit in full-length pants, socks and shoes).

What with all the leaves and garden debris, we've had three compost piles for a while now:


In fact, the first one has been emptied and restarted a couple of times. The second one is also our kitchen compost (aka critter feeding station) which is a favorite with the deer, the turkeys, and nighttime visitors (skunk, armadillo, and raccoon are all possible candidates). The night visitors are especially helpful as they like to dig through the pile (for grubs?), which turns everything over. The third pile is on its second go-round and has a long way to go.

But as we began clearing prickly pear cactus in earnest, we realized we needed more compost piles, so we moved out to an open area by the flood plain, creating the fourth pile, currently capped with grass and leaves from this spring ... so we won't peek for another six months. I know you're supposed to turn compost, but if you wait long enough, compost happens.


Then things got a little crazy ... I started two more piles and ended up falling into one of them whilst trying to dump a load of prickly pear (see my May 29 post "On pins and needles"). That was when I realized I needed to go out rather than up and our compost piles became compost rows ... four of them at present, each ranging from 15 to 25 feet long.


I'm in the process of putting a layer of "bad" grasses over the cactus ... except for the last row, which I'll leave exposed.


That way when we burn brush and tree limbs out on the flood plain, the cactus pads can be used to cover up the embers when we're done. Since they're full of water, they pretty much put the fire out. Amazingly, some of the cactus actually survives and begins to sprout ... forming a great fire break (or is that "brake") for the next burn.

But before we burn again, I have some harvesting to do ...


because those little white spots are making me see red ... yep, cochineal red.

To be continued ...

Friday, October 3, 2014

- The kitchen towel series: Lessons in slow cloth

I love to hang stuff out to dry. Aside from the eco-friendliness (and thrift) of it, there's nothing to match the thirstiness of terry cloth towels or the crackly crispness of sheets and napkins set out in the hot Texas sun. Better yet, linen rarely needs ironing when it air dries.


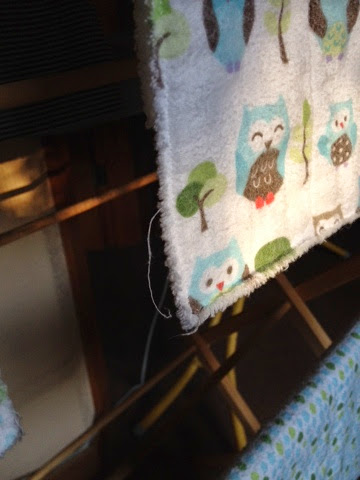
Indeed, this is one of two drying racks that we put on the moving van before traveling the 1500 miles from Virginia to Texas back in 2009 (the wooden rack to the left is a quilt stand that my dad made years ago). When we arrived, I remember being absolutely giddy when the bath towels I put outside dried before the next wash load was done.

So yesterday I washed the four kitchen towels made over the past several months of slow cloth study and hung them out to dry so I could photograph them in their un-ironed glory. Then I recalled the lessons learned as I made them (you can also look back on the original posts by clicking "KitchenTowel" in the index to the right).

Why kitchen towels? Because they're a good size for trying new stuff out, for testing how the results stand up to machine washing, and for getting to feel the results in-hand, day in and day out.

Kitchen Towel 1 (front view of running stitch)

I started my study of slow cloth (a concept first encountered on Pinterest) by doing some simple running stitch (aka Kantha) with a single strand of floss on a pre-made linen/cotton napkin. As each strand ran out, I chose one subtle color after another.

Lesson 1: If you want your stitches to show, 
be sure to pick colors that contrast with the ground cloth.

Kitchen Towel 2 (front view of running stitch)

Because the lines of stitching on Kitchen Towel 1 did not run parallel to the machine-hemmed napkin, Kitchen Towel 2 was done on a piece of linen cut from an old table cloth and hemstitched to ensure perfect margins (a lesson learned back in the days when I was obsessively making altar linens at Hickory Neck church). Notice how the closely stitched area is far smoother than the unstitched area. And since I knew both sides would be visible, I chose not to use knots.

Kitchen Towel 2 (back view of backstitched thread ends)

Lesson 2: Backstitching anchors thread ends as well (or better) than knots,
looks pretty good from both sides, and stands up to repeated laundering.


Kitchen Towel 3: Spirit Stitch Sampler (front view of stitches and quilting)

About this time, I stumbled onto Jude Hill's Spirit Cloth blog and decided to do her online self-study class Spirit Cloth 101. Wanting to remember the stitches she presented, I went back to my cotton/linen napkin supply and doodled a random path for Kitchen Towel 3: Spirit Stitch Sampler ... without any backing. 

Spirit Stitch Sampler (back view of quilting on muslin layer)

Lesson 3: It's much easier to layer cloth from the outset 
than to apply layers later.

Lesson 4: This isn't my mother's quilting ... it's fun!

Kitchen Towel 4: The Homestead aka The Golf Course
(front view with quilting aligned north/south and east/west)

Unfortunately, I started Kitchen Towel 4: The Homestead before learning Lesson 3. 

The Homestead (back view of quilting on harem cloth)

Fortunately, an order from Dharma Trading arrived in time for me to learn ...

Lesson 5: Harem cloth is amazing stuff.

The Homestead (front stitch detail)

I played around with surface stitching, appliqué and quilting. And even though the appliquéd patches of trees came out looking more like a map of a golf course, I learned ...

Lesson 6: Ragged edge appliqué does not fall apart,
even after repeated washing and handling.

The Homestead (front lettering detail)

Finally, even though I loved the look of the stitches made over rubber-stamped lettering on The Homestead, I now choose to hand-letter my needlework.

Lesson 7: Be true to yourself ... it's way more fun.

Thursday, October 2, 2014

- On naming things: A linen shirt called RAIN


My mom passed away in 2008 ... the same year that my daughters Meg and Meliss got married ... so much happiness and sadness ... beyond words to tell.

I went to Shelter Island that summer to help my dad go through Mom's clothes and crafting supplies ... this linen top is one of the things I brought home (also her quilting pins, which sit on the table next to my coffee cup in this post). 


I wore it often, and the hem began to fray.


The facings were loose from the get go ...


As I stitched them down, I found myself humming the Jimmy Davis song "It's only rain" ...


and so it became "RAIN" ...

N.B. Giving credit where credit is due: the idea of naming and labeling Boro-style clothing came from Jude Hill. 

Wednesday, October 1, 2014

- Making do: Weaving a Boro-style solution


This is where I ended up, but the story starts here:


I bought a pair of Capri pants earlier this summer ... on sale of course. Unfortunately, I soon discovered why they were marked down: the decorative zippers were incredibly uncomfortable whenever I crossed my legs, which was often. 

So, having taken an online study with Jude Hill on Considering Weave, I decided to try weaving on cloth to make sturdy strips in place of the zippers.


On my first couple of tries, I set up a bead loom with a crochet cotton warp, then randomly wove linen cloth into it. Two strands of cotton floss then got stitched through the fabric and between the warp threads as a kind of weft.


But the resulting strips were too heavy, so I went back to the drawing board.


I used a lighter warp (20/2 linen thread that I've had for decades), a scrap of green table cloth linen (from the kitchen towel series ... which reminds me, I need to write a summary post on that), and cotton/linen thread unraveled from a sweater that my daughter was sending to Goodwill.


The more I worked, the less sure I was whether I was weaving ...


or stitching ...


And in my mind I began to word play ... Was I steaving or witching? No matter. The resulting strips were the perfect weight to sew into the pants ...


I even used the holes from the torn out zippers as a stitch guide.


Field testing remains to be done, but I'm pretty sure it was time well spent. And if nothing else, I now have an intriguing new technique in my stitch repertoire.

Tuesday, September 30, 2014

- Touchstone: Jude Hill's September Window


When Jude Hill posted this piece on September 11, it touched my heart. And though I don't (yet?) know the story it tells from Jude's perspective, for me it spoke of the towers, their fall, and the rising of souls on a ribbon of fire. 

My brother Art, a lieutenant in the FDNY, fought the fire and lived. My husband's Uncle Chuck went to work in the World Trade Center that day and never came home.

Jude kindly reserved September Window for me in her shop and it arrived in Texas yesterday. 

"Are you going to frame it?" Don asked.

"I can't," I said, "it's a touchstone so I want to keep it close by. Besides, even the back tells a story."


So here it will stay, for now anyway ... on my chair, where I sit in the sun, looking out on our front yard ...


my works in progress piled on the ottoman in front of me ...


morning coffee close at hand ...


So fortunate, in so many ways.

Thank you Jude ...

[Note: This post was made with permission from Jude Hill]

Friday, August 22, 2014

- Maternal instincts of the grand kind: Stitching for the newest member of the family

When we headed up to St. Louis last month for Jackson's second birthday, we returned with a list of projects for little brother Jace who is due September 4th. They have been duly completed with two whole weeks to spare!


First up was a set of four 10"x10" canvases spelling out the new baby's name, two of which were covered with cloth from the woodland crib sheets. Each canvas was padded with white flannel and cloth laced on with heavy quilting thread (which I no longer use for quilting, thanks to Jude Hill). The letters were ably painted brown by Don (aka Pop Pop), but are not yet affixed (so I guess I'm not done done).

Lacing fabric onto a backing is also a great way to make a mount for needlework
Having a fair bit of leftover crib sheet fabric, I decided to tackle my first-ever quilt. The backing was a piece of blue striped flannel (see background in the picture above) and the middle layer was a gossamer piece of harem cloth. After hand quilting meandering vertical lines of variegated green floss between the owls and trees, I zig-zagged a wavy outer border with the sewing machine and cut away the excess cloth with pinking shears. After several washes, the edges have stabilized into a soft fray. I also embroidered letters and numbers along the bottom edge of the quilt, including a run of backward ABCs (for those who haven't yet memorized them) ...


... then stitched Jace's name across the top, followed by members of his extended family tree.


And of course I had to make at least a few new burp cloths, even though there are plenty left over from Jackson. I did notice that the cloths I made the first time around kinda seized up after being run through the washer and dryer, so this time I made raw-edged cloths and washed them a few times to work out the loose threads. So far they are much less inclined to bunch up, probably since there isn't a lot of bulk from turning under the edges.

All that's left to do now (aside from gluing on letters) is wait to learn what birth day stats to stitch into the trees on the quilt and the family sampler. My prediction is that Jace will be 7 lbs 14 oz and that he'll arrive on his due date ... just like his mom.