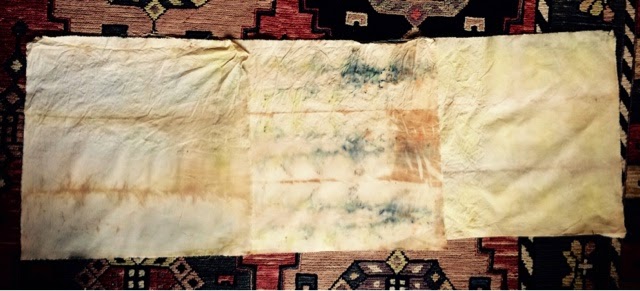
Monday, May 18, 2015

- Worth waiting for: On the banks of Sink Creek

Looking upstream

In the nearly five years that we have lived on our homestead I have never seen Sink Creek. Oh, there was evidence of its existence on the aptly named flood plain, but whenever there was a gully washer I was either at work or it was the middle of the night or there was too much thunder and lightning to safely go outside.

Until yesterday, when the storm clouds dumped 3.5 inches of rain in a  few hours, making a river out of our front yard ...


then quickly pushing off to the east, enabling me to finally take a look before the water soaked into the aquifers below. 

Our fire pit, which has stood unused through the recent years of drought, became a nascent mosquito pool ...


So I undammed one end to let the water drain out ...


Slogging through the recently mulched West Trail lichen farm, we were glad to see that our efforts were worthwhile as the water pooled under the branches without breaking through and washing out the path as it had in the past ...


But it was the flood plain that inspired the most excitement. Water was moving, rapidly ...

The creek already receding ... sinking into the earth

and up to a foot deep, carrying with it seeds and silt, Mother Nature's best planting method ...


Indeed, last year's heavy rains carried bluebonnet seeds from upstream where they bloomed for the first time on our property earlier this spring ...


With this most recent deluge, I have no doubt new seeds have been spread even farther downstream.

But it was the voice of the water, chuckling through the rocks, that most delighted me (if only I could figure out how to insert a video into Blogger, you could hear it, too). Instead, I'll just leave you with one last look from the headwaters of Sink Creek ...

Looking downstream

already gone, but not forgotten.

Wednesday, May 13, 2015

- Triangulation: The last word

Jude Hill has been talking about measuring in her Small Journeys on Spirit Cloth ... or more accurately, about not measuring. About trusting the process and one's own internal measure.

Which makes sense. When you think about it, we're all pretty good at measure. Think of tipping your head while looking at a picture on the wall and saying, "That's not quite level" ... then confirming it with a level, as if you really needed it.

For years I have reveled in clean-the-fridge cooking, where there always seems to be the right amount needed for a pasta or a salad, a soup or a sandwich. I made bread at my daughter's recently and there was just enough bread flour in the bag for what I needed. I love it when that happens.

But it takes practice to trust one's gut, to accept the unexpected, to internalize the measure of things.

And so ... Triangulation was a huge leap of faith for me. Made without measuring, without a plan ... strips of cloth torn and woven together ... then stitched and stitched and stitched again until its integrity was sure in my hand ... then wrapped around a piece of stuffing that had been free-cut from an old body-length pillow months before ... finally safety pinned and ladder stitched together.

Resting at last on the couch, a-side ...


or b-side, depending on how it falls ...


The top seam more obvious ...


the back seam less so (it's the second from the right) ...


There is much to be said for not measuring.

Monday, May 11, 2015

- Doing the right thing: Stitching an image from Etsy


This post will be longer than usual, but it’s a story worth telling I think.

Earlier in the year I “signed on” to a Facebook post from a friend. Called “Pay it Forward,” the idea was that she would send something during the course of the year to the first five people who responded “I’m in.” The catch was that you had to do the same. So I did.

Of those who responded to my “Pay it Forward” post, one was a long-ago church friend from Hickory Neck. Back in the day, we were both active in the Cursillo movement and spent many weekends ferrying back and forth from Williamsburg to Camp Chanco in Surry. Often we would see great blue herons on the James River, which my friend Judy called her god birds. Ever after, when I saw a great blue fly overhead, it lifted my spirits. Judy went on to retire from teaching and attended seminary, after which she became an Episcopal priest. Since I loved making altar linens, I created a miniature set for her travel communion kit. In all likelihood the linens are long-since disintegrated, but the thought of them still makes me happy.

I in turn carried a gift from Judy on various keychains for many years --a penny with a cross cut out of its middle-- most recently on my mailbox key ring. I wanted to use that penny in some way for Judy’s pay it forward gift, so I set it between two layers of cotton muslin, drenched it with vinegar and salt and placed in on a sponge. Then I let it sit for well over a month, dripping a little more water over it every so often [those of you with Christian backgrounds are probably nodding your heads over the time period and the vinegar sponge references, but truly they were not intentional at the time  .. only in hindsight]. After a while, the copper in the penny left a faint circular impression surrounded by a pale blue-green halo. Not exactly the dramatic result I was after, but it was what it was.

I began to wonder what to do next. Remembering the god bird, I googled an image search for great blue herons and came upon a simple line drawing by Kim Moore on Etsy. My first thought was that I could try making one of my own, but that didn’t feel right. So I wrote to Kim and asked if I could purchase the right to copy her image and create a piece of needlework. And then waited … and waited … finally deciding that Kim must have thought I was a spammer. Until out of the blue, she responded with an explanation that she had recently completed her masters and was just getting around to my (unusual) request.

We negotiated an agreement that I could make one reproduction of her heron image in needlework for the cost of the line drawing. I also offered to pay for the privilege again if and when I ever made another. Kim created a special one-time listing on Etsy and I paid her with my credit card. It was so simple to do and it felt incredibly “right.” I also told Kim I would provide a link to her work at the Etsy shop (here) and was delighted to also find a profile of her in Dharma Trading, a favorite stop for many of us in the stitching blog-world. 

As for the process of converting her art work into stitch … I copied the heron image into a photo editor to eliminate some stray background color, then pasted it into a Word document and made a test print to see how it would look. After a little tweaking, I ironed a piece of muslin to freezer paper, cut it to 8 ½ x 11, crossed my fingers and sent it through my old HP 932 inkjet printer (since it's 15 years old I would have been sad if the printer jammed, but not freaked out). Fortunately, no funeral was needed for the printer and I was delighted beyond words by my first attempt at printing with my own fabric rather than the stark white printer fabric from the office supply store that I had used in the past.

I tore the heron picture roughly to size (safe in the knowledge that I could always print another), then tore the penny cloth with a bit more trepidation, knowing that it would take at least a month to create another if things went wrong. After trying several layouts, I invisibly basted both pieces to some windfall lichen-dyed muslin (thank you Jude Hill and India Flint) and began to stitch.

Debating with myself about whether to keep with Kim’s black-on-white image, color won out and I picked several soft shades to complement the watery blue-green cloth. For the sky I chose kantha stitch, leaving the face of the orb clear (sun or moon I leave for you to decide). For the heron I chose Jude’s split backstitch, which put me in mind of feathers and grass seed heads.

After taking a b-side picture ...


I put it into a 5x7 mat and took one more shot …

then let it fly away home.

Saturday, May 9, 2015

- Potholder take 2: Nana Kantha and the Texas Two Step

Well, here's where I ended up on this latest potholder trial (repurposed in August 2015 as part of the Table Series) ...


And maybe all you need to know is that it consists of four layers of tea-dyed tablecloth linen and eight layers of eco-dyed sheeting stitched together with floss. Or you can follow me through the process, since I want to document it before I forget what's hidden in all those layers.

The project started with cotton sheeting from last year's dye trials torn into 7" squares. My first idea was to stitch pairs of the sheeting together, pile them up until I had a good thickness for a potholder, then stitch them all together zokin-style.

Except the cloth didn't feel like it would work the way I envisioned, so I tore up 7" squares from an old linen tablecloth and tea-dyed them so the colors would meld with the sheeting ...

Tea-dyed tablecloth linen on the left, eco-dyed sheeting on the right

Then I tried pairing the sheeting and linen, but it still didn't "feel right" ... so I tore two squares of the sheeting into three strips each, wove them together into a nine-patch, invisibly basted them to a piece of linen and Kantha stitched them. Much better, but still not quite right ...


Next I tore two squares of sheeting into four strips each, wove them together into a sixteen-patch, basted them to the linen and tried the Combination Stitch from the end of this post which I soon began thinking of as "two steps forward and one step back stitch" ...


Not only did it look kinda cool on the a-side, it had a pretty neat effect on the b-side ...


Figuring "nothing ventured, nothing gained," my third take consisted of two squares of sheeting torn into five strips each and woven into a 25-patch ...


invisibly basted and then stitched to the linen square with variegated floss ...


That's when it hit me that the stitches reminded me of Morse Code. Curious, I looked up "dash dot" and "dot dash," which just happen to stand for "n" and "a" respectively. Nana! Nana Kantha! 

And the back? Texas Two Step of course ...


Thoroughly full of myself and my corny word play, I put the three three-layered cloths together. Only to find they still didn't feel thick enough to make a trustworthy potholder. So, one more pass was needed ... but what?

There was a piece of tea-dyed linen that I especially liked, so I backed it with two squares of sheeting woven into a sixteen-patch, basted them together, and started (discontinuous) backstitching around the edges of the stains ...


When it was done, the b-side was almost (but not quite) as interesting as the front ...


Twelve layers (four cloths of three-layers each) finally felt like enough thickness, so I contemplated which of the eight a-sides and b-sides would become the final a-side and b-side of the potholder.

Since they were the least inspiring, I didn't think twice about basting the nine-patch and the sixteen-patch together to be the invisible middle of the potholder. And yes, I used invisible baste with a backstitch ... not for the sake of appearance, but because I've discovered that basting with a tiny backstitch is virtually impossible to undo and therefore gives the most stability.

It was a given that I wanted the outlined tea stains to be visible on one side of the finished product. But I surprised myself by choosing the b-side of the 25-patch to be the on other side of the potholder ...


It must have been something in the wind(thread) ...

Friday, May 8, 2015

- Hoping it will all come out (okay) in the wash

After several days of hanging in gentle rain and persimmon-shaded sun, I brought in the newly dyed cloth.

Taking a idea from newfound KINDRED SPIRIT Deb Sposa at Artisun, I decided to iron half of each cloth on a high setting to see if the colors would set better with or without heat.

For sure the dyed images jumped out of the newly pressed cloth ...


But knowing that they might fade regardless of whether they were heat-set or not, I took some before shots to record what was ...

Red and yellow onion skins mordanted with
copper, alum and iron (from left to right)


Windfall lichen mordanted with
copper, alum and iron (from left to right)

Alum mordanted red cabbage, salvias and rosemary (from left to right)

So, with once last look at my favorite alum-mordanted salvias ...


I dispatched them to the (hopefully) tender mercies of the washing machine.

Film at 11:00 (if not sooner).

Tuesday, May 5, 2015

- The passage of time

As James Taylor says, "the secret of life is enjoying the passage of time" ... whether it's flying by when spending it with loved ones or dragging by when you're waiting for news or a special day.

So my solution to waiting for the latest dye trial results was to go out of town. It was worth it in every way imaginable ...


Of course, the best part of waiting was visiting the grands in Missouri ...


Followed by coming back to our Texas grandson ...


But getting to the dye results was definitely a little less sweet. I hadn't capped the jars tightly enough, so leakage and mold happened over the course of ten days ...


Rinsing off the decomposed plant matter was akin to what I imagine a dental hygienist experiences on a really bad day. Definitely not for the weak of stomach! But the results were pretty cool, some more so than others of course (this photo was taken following a preliminary rinse in warm tap water) ...


Mordants from left to right (note: all the cloth was pre-mordanted in soy milk, kept overnight in the fridge then rinsed):
  • Copper
  • Alum
  • Iron
Dyestuffs from top to bottom:
  • Lichen (windfall Parmotrema austrosinense)
  • Mealy blue sage (wild Salvia farinacea)
  • Rosemary (Rosmarinus officinalis)
  • Salvia amistad and S. greggi
  • Red cabbage
  • Red and yellow onion skins
My favorite? The alum mordanted Salvia amistad ...


Oh, and I almost forgot! Here's the B-side of Triangulation, now fully reinforced and worth every extra stitch, although the front looks virtually the same as before (which is why I haven't shown the A-side here) ...


The final reveal will probably be in pillow form, but only time will tell.

Thursday, April 23, 2015

- Dyeing to peek

Well, I'm trying dyeing again, inspired by India Flint's Bundle Book (which I bought in digital form) ...


this time using 14" squares of unbleached cotton muslin soaked in store-bought soy milk (I blush), dried overnight, rinsed and spun through the washer until  just damp.

I laid various dyestuffs (listed below) across the middle of each muslin square ...


folded over one-third of the muslin and laid out a second layer of material ...


folded it over yet again ..


rolled snugly ...


then wrapped each bundle in cotton or wire (detailed below) ...


The dyestuffs I'm using this time are fresh rosemary (shown above), dried red and yellow onion skins (combined), chopped red cabbage, windfall lichen (Parmotrema austrosinense), mealy blue sage (wild Salvia farinacea) ...


and a combination of cultivated Salvia amistad and S. greggi from Don's garden beds ... 


I made three packets of each dyestuff, then wrapped them in either copper wire, steel wire or crochet cotton. 

The copper wire bundles went into a copper pot with untreated well water from our outdoor tap. The smell of sulfur from our 900' well is unbelievable and I'm hoping there will be a chemical reaction with the copper. After simmering the bundles for just over an hour some blue is starting to show ...


After a couple of hours, I'll put the copper bundles and the sulfur-rich steeping water into canning jars with used tea bags and seal them up.

The steel wire wrapped bundles have already been put into canning jars with boiling tap water, used tea bags and fine steel wool. However, after one hour the color got so dark (see below right) that I chickened out and removed the steel wool (leaving a small bit behind, no doubt).

Finally, the cotton wrapped bundles were put into a solution of boiling tap water and pickling alum (1 tsp. per canning jar) along with the obligatory tea bags, which are also starting to show color (below left) ...


Now the question is, can I keep my hands off of the dye trials for at least a week?

Fortunately, I have a plan. Having finished the kantha stitching on Triangulation ...


I'm now "design mending" (a Jude Hill term) by invisibly basting strips of cloth onto the back along the intersections since the original cloth weaving strips don't meet closely enough ...

I started design mending with dyed sheeting, then decided to switch over to muslin for the remainder

It's gonna take a while ...

The bottom shows a 1" strip of muslin invisibly basted across the length of the cloth
which will be the method used for the remainder of the design mending

But my reward for finishing will be the dye trial reveal. Motivation times two!